Contact Roles
When you add a contact to a transaction, you assign a role that describes their part in that deal. The same contact can have different roles on different transactions.
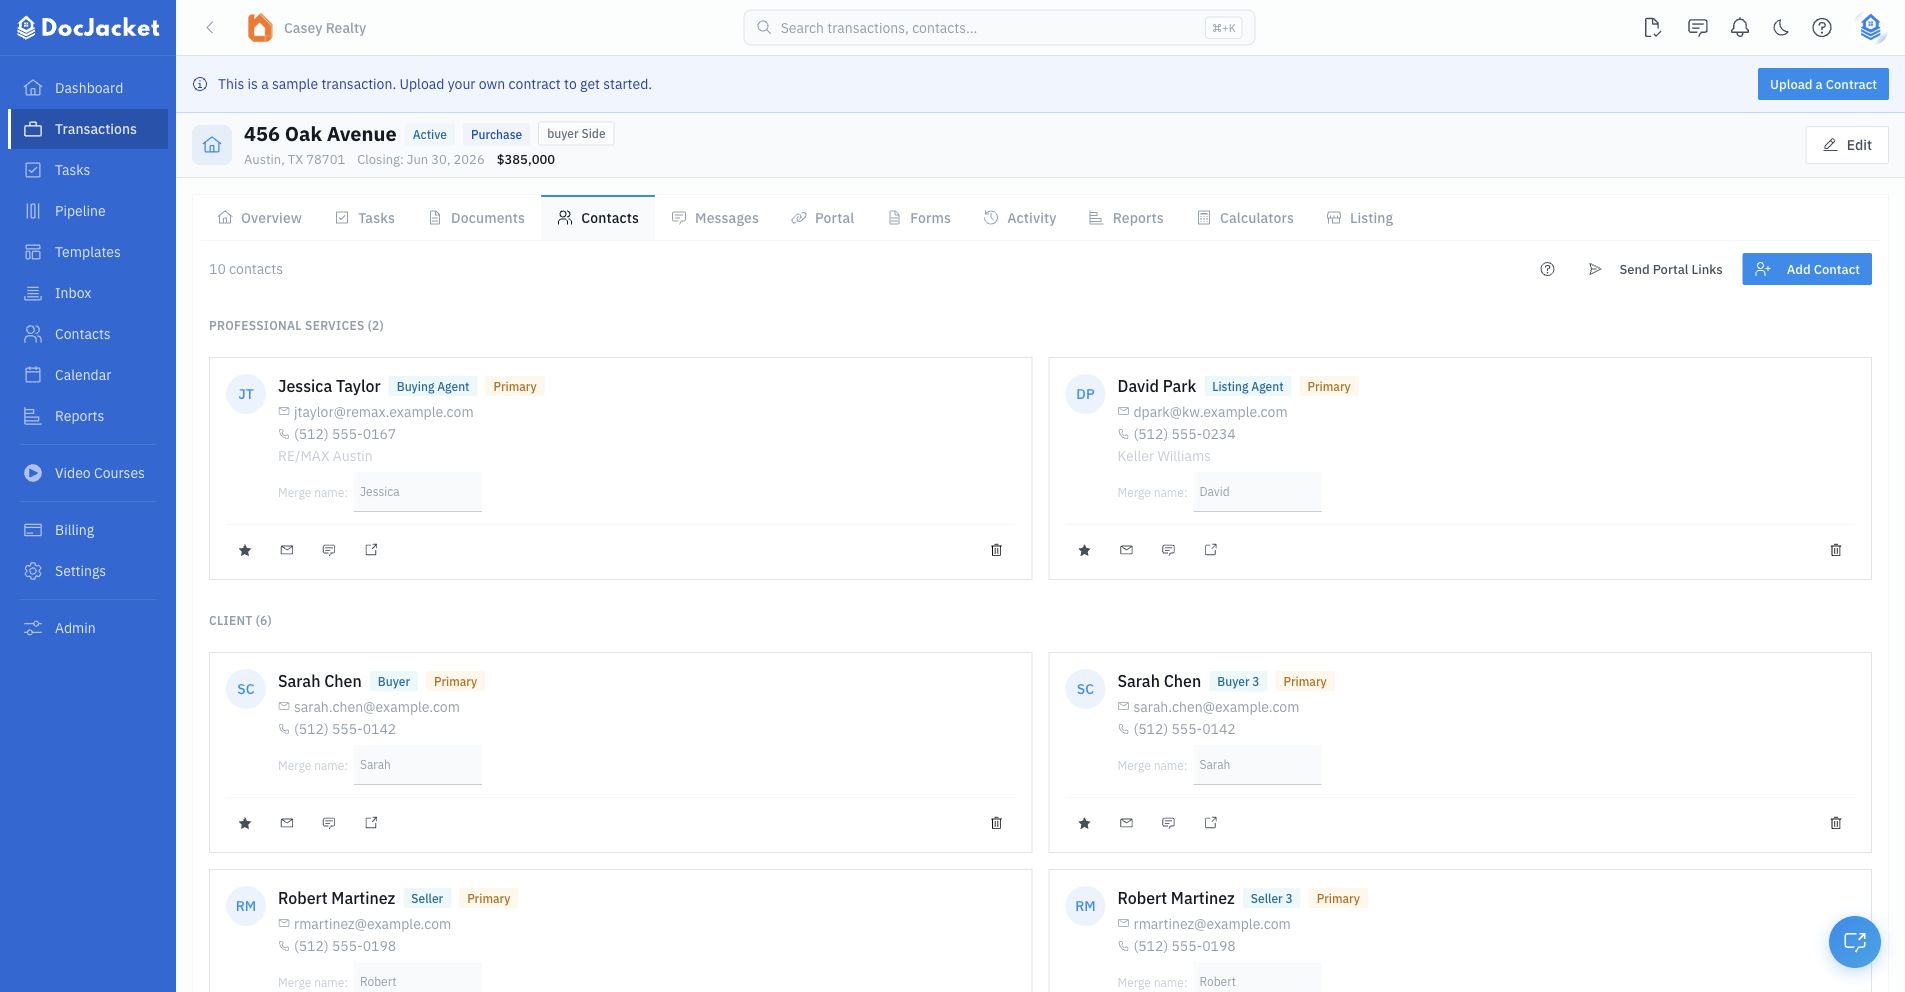
Role categories
Transaction contacts are grouped by role category on the transaction Contacts tab.
Primary (Clients)
- Buyer, Seller
- Buyer's Representative (POA / Trustee), Seller's Representative (POA / Trustee) — someone acting for the buyer or seller under a power of attorney, or as trustee, executor, or guardian. This is not the buyer's agent or listing agent; add agents under Buyer Agent or Listing Agent. See Buyer's Representative is not the buyer's agent.
Professional (Agents)
- Listing Agent, Buyer Agent, cooperating agent roles
Legal & Title
- Title Company, Closing Attorney, Escrow Officer
Lending
- Lender, Loan Officer
Service Providers
- Home Inspector, Appraiser, Surveyor, Contractor, Insurance Agent
Other
- Property Manager, HOA Contact, and custom roles
Why roles matter
Roles do more than label contacts:
- Transaction organization — The Contacts tab groups contacts by role category, such as primary parties, professional services, and service providers.
- Expected roles — If a transaction expects certain roles, empty role slots appear until you assign a contact.
- Communication — Email compose and templates can target recipients by role.
- Reports — Transaction reports can show participants with their role labels.
- Merge display names — Each transaction contact can have a merge name for emails, such as "Celia and Bill."
- Portal links — Transaction contacts can receive portal links by email or SMS. Portal access is managed per transaction contact.
Transaction Contacts tab
Open a transaction and go to Contacts to manage the contacts for that deal.
Add a contact to a transaction
To add another contact — for example an escrow, title, or lender contact — to an existing deal:
- Open the transaction and click the Contacts tab in the row of tabs across the top.
- Click the Add Contact button in the top-right corner of the tab. (This is the "add another contact" button — it is labeled Add Contact.)
- In the drawer that slides out, search for the person or company. If they are already in your contacts they appear as you type; if not, click Create New Contact to add them.
- Choose their role (such as Escrow Officer, Title Company, or Lender) from the party-grouped list.
- Click Add Contact to save them onto the transaction.
You can also add a contact from an empty expected role slot by clicking Assign on that role card, which opens the same drawer with the role pre-selected.
Search results show the email address each contact record will use - that is how you tell two similar records apart. Once added, the person appears under the Contacts pill in the deal's email composer, and role-based template emails include them automatically.
The Add Contact button lives only on the transaction's Contacts tab, not on the Overview. If the Contacts tab itself is missing, it has likely been hidden for your view — open the transaction's Overview, click Customize View, and turn Contacts back on. The tab (and the Add Contact button) will reappear.
From this tab you can:
- Fill expected role slots
- Add an existing contact or quick-create a new one
- Filter the contact picker by organization
- Choose a role from party-grouped role lists
- Mark a transaction contact as primary
- Edit the merge display name used in email templates
- Send email or SMS from a contact card when the contact has the needed details
- Create, copy, regenerate, or revoke a portal link for that transaction contact
- Remove the contact from the transaction without deleting the contact from the directory
The same person can appear on multiple transactions with different roles. The transaction role and merge display name live on the transaction relationship, not on the global contact record.
Custom roles
If the built-in roles do not cover your workflow, create or edit roles in Settings > Transaction Roles. Roles can be grouped by party so the Add Contact drawer stays organized.
Primary contacts
A transaction contact can also be marked Primary. Use this when one buyer, seller, agent, or service contact should be treated as the main contact for that role.