Sharing Portal Links
Portal links are how clients, agents, and other transaction parties access their portal view. Each link is unique, secure, and managed individually.
There are two transaction-level places to work with portal links:
- Portal tab — Create links, preview the portal, manage branding, review analytics, send portal-link emails, and manage link details.
- Contacts tab — Manage each transaction contact's link from their contact card, including create, copy, regenerate, revoke, and send portal-link delivery options.
Creating a portal link
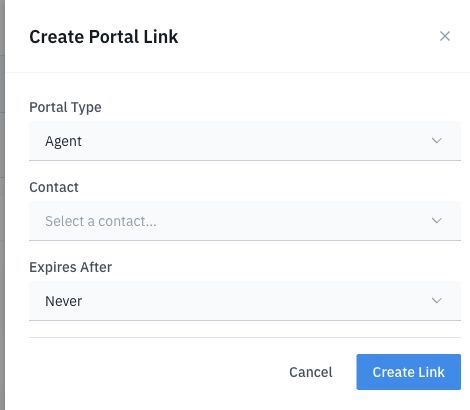
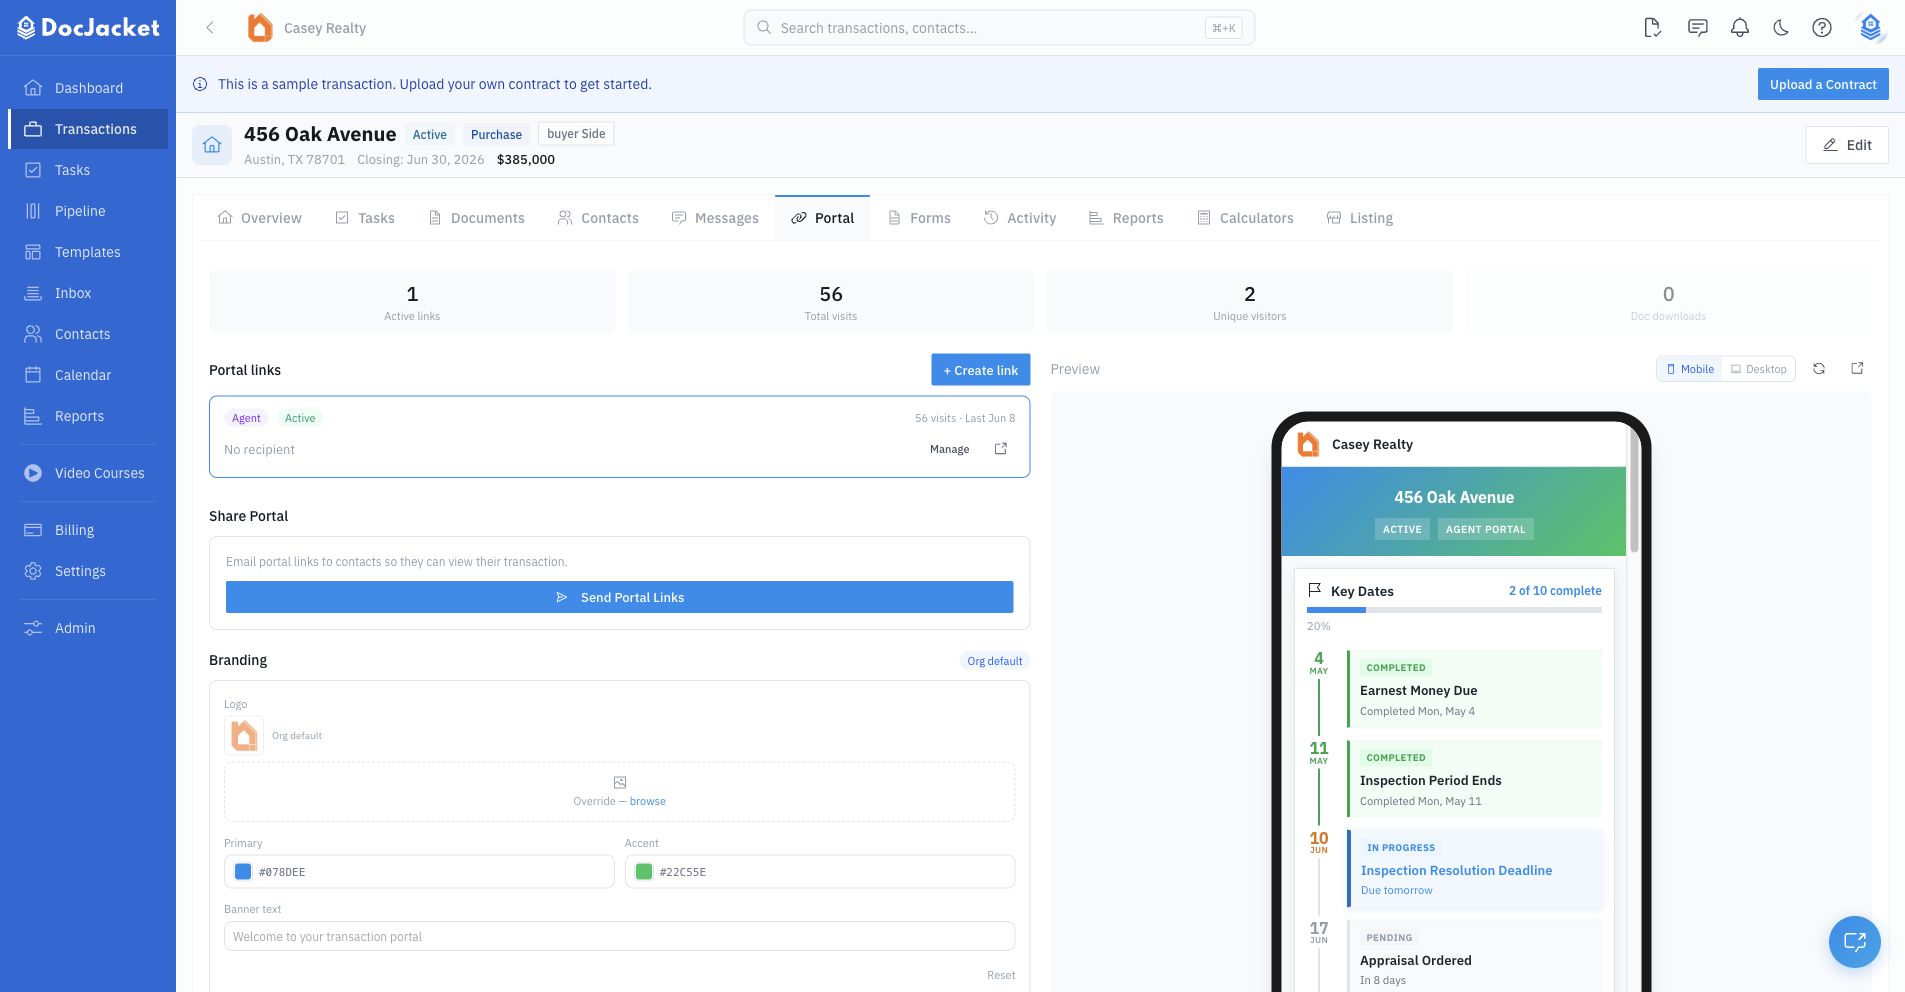
- Open a transaction and go to the Portal tab
- Click Create Link
- Choose the portal type: Buyer/Seller, Agent, or Vendor
- Select a transaction contact
- Set an expiration period: 7 days, 30 days, 90 days, or never
- Click Create
DocJacket generates a unique URL for that recipient. The Portal tab also shows a live preview so you can check the mobile or desktop view before sending.
You can also create a portal link directly from the transaction Contacts tab. On a contact card, click the portal-link action. DocJacket creates the link, copies it to your clipboard, and marks that contact as having an active portal link.
What the link opens
The link opens a branded portal for that recipient. Depending on their access level and the data you've shared, the portal may include:
- Key dates and transaction status
- Portal-visible documents with preview and download controls when downloads are allowed
- Portal-visible tasks
- Parties, agents, title, lender, and service providers
- A live calendar subscription link
- Print and branded one-page PDF actions
Portal links are different from Disclosure Package links. Use a portal link when someone needs an ongoing transaction view. Use a Disclosure Package when someone needs to review a specific packet of documents and optionally acknowledge receipt.
Sending the link
You can send the portal link by:
- Email from DocJacket — Click the send button next to the link to compose and send an invitation email right from DocJacket
- Portal tab > Send Portal Links — Select transaction contacts with email addresses, or add manual email addresses, and send portal-link invitations
- Contacts tab > Send Portal Links — Select transaction contacts and choose email delivery where contact emails exist, or SMS delivery for contacts that already have an active portal link and phone number
- Copy and paste — Copy the link URL and share it however you prefer (email, text, etc.)
- Transaction Contacts tab — Use each contact card to create, copy, regenerate, or revoke that contact's portal link
SMS delivery uses the organization's SMS setup and safeguards. If you want to text a portal link from the transaction Contacts tab, create or regenerate that contact's portal link first so the text includes the active URL. Portal chat remains separate from SMS credits.
Managing links
From the transaction Portal tab, you can see active and inactive links for that transaction and:
- View stats — See how many times each link has been viewed
- Extend — Push back the expiry date
- Revoke — Immediately disable a link if you need to cut off access
- Reactivate or delete — Restore an expired/revoked link when appropriate, or delete a link you no longer want to keep
- Preview — Select a link to view the portal in the embedded mobile or desktop preview
- Send by email — Open a portal-link email composer from the link detail drawer
- Review access details — See last access time, last IP when available, calendar feed status, and revocation information
Tips
- Create separate links for each party — buyers, sellers, and agents each get their own link with appropriate visibility
- Set expiration dates for sensitive transactions
- Check the stats to see if clients have actually viewed the portal — if they haven't, follow up
- Regenerate a contact's portal link when you need a new URL but want to keep portal access available
- Revoke a link when access should stop immediately