Checklists
Checklists define the reusable workflow for a transaction type. A checklist can include Key Dates, Tasks, and Automations so a new transaction starts with the right deadlines, task list, and prepared emails.
The key idea:
- Key Date Library defines reusable date rules
- Checklists bundle those key dates with tasks and automations
- Transactions apply a checklist to create real key dates and real tasks
This is the same product category as a reusable date-template workflow: set the date logic once, then apply it to future transactions. In DocJacket, that logic lives in the Key Date Library, and the checklist adds the work that depends on those dates.
Checklist list page
Go to Templates > Checklists to manage checklist templates.

The page has two tabs:
- My Templates — checklists your organization owns and can edit
- Shared — system-provided checklists available to all organizations
Shared checklists are read-only. Use Copy to My Templates or Duplicate before customizing key dates, tasks, or automations.
Use the filters to narrow the list by:
- Transaction Type — Sale, Listing, or both
- Property Category — Residential, Commercial, Land, Lease, New Build, and other categories
- Status — Active or Inactive
- Complexity — Lite or Standard
- Search — checklist name or description
On My Templates, you can mark an active checklist as the default. Default checklists can auto-apply when creating transactions for the matching state and type.
Creating a checklist template
- Go to Templates > Checklists
- Click New Checklist
- Add a name, transaction type, property category, state, side, and description
- Save the template to open the checklist builder
- Add key dates from the Key Date Library, or create new key dates while building
- Add tasks and tie them to the key dates they belong to
- Add task timing rules, priorities, phases, and sections
- Add automations, such as scheduled emails or completion rules
- Use Test template to preview the checklist against a sample effective date
- Save the template
The builder title may say New Checklist Template or Edit Checklist Template. The Templates hub and list page label this area Checklists.
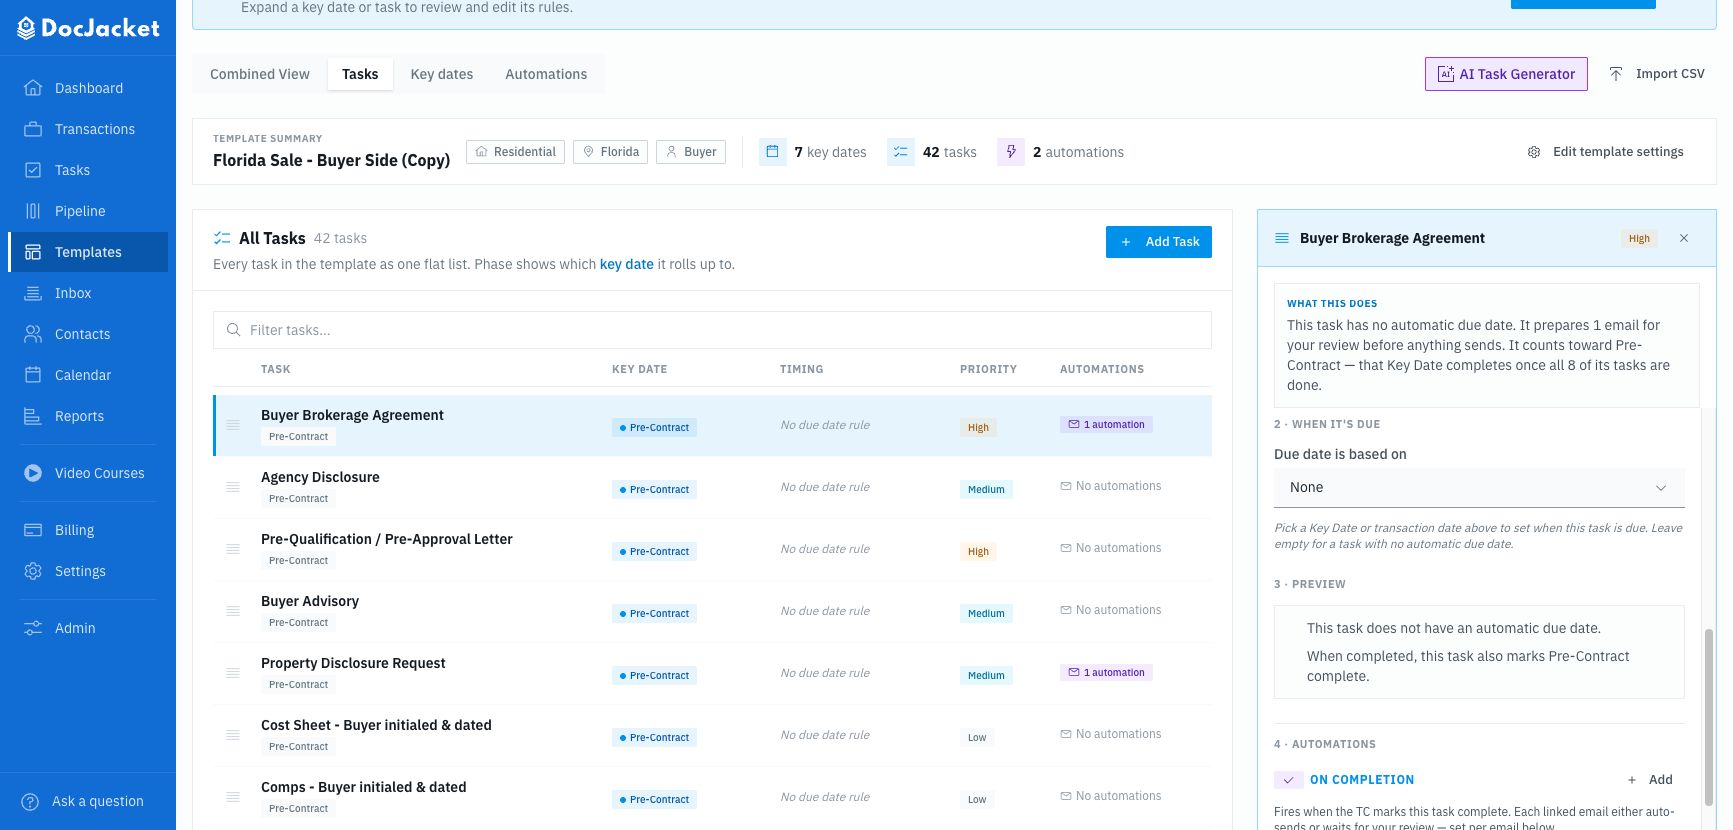
Template settings
The builder shows a Template Summary card with the checklist name, category, state, side, key-date count, task count, and automation count.

Use Edit template settings to change:
- Name
- Transaction Type
- Property Category
- State
- Side
- Description
System templates are read-only. Copy a shared system checklist into My Templates before editing settings, key dates, tasks, or automations.
Adding key dates
Key dates organize the checklist. For each key date you can define:
- Name
- Description
- Key Date Type
- Side
- Category
- Priority
- Date rule type
- Anchor date field
- Offset direction
- Offset days
- Calendar-day or business-day calculation
- Whether the date is required
Use Add Key Date in the builder. The drawer has two modes:
- Create New — define a new key date rule directly inside the checklist
- From Library — pick an existing reusable key date from the Key Date Library
If a shared key date needs customization, duplicate it first and use the copy in your checklist.
Adding tasks
Checklist tasks are the work your team completes during the transaction. Tasks can include:
- Name and description
- Phase and section
- Priority
- Assigned owner
- Due-date anchor
- Offset days and direction
- Calendar-day or business-day calculation
- Linked key dates
- Document category
- Subtasks
- Scheduled emails
- On-completion email actions
Tasks should reference the key date they depend on. For example, a task can be due 3 days before Final Walkthrough instead of hardcoding the same rule from Closing Date.
Automations
Automations can be attached to key dates or tasks. In practice, most automations live on tasks.
Common automation uses include:
- Prepare an email when a task is due
- Send a linked email template
- Include selected document categories
- Trigger follow-up work when a task is completed
Use Review automations to see every automation rule in the checklist, grouped by key date and task. From there, use Edit to jump back to the rule in the builder. Bulk editing across automation rules is not currently part of this drawer.
AI and bulk tools
The checklist builder includes tools for faster setup:
- AI Key Date Generator — Describe the transaction workflow and review proposed key dates before applying them.
- AI Task Generator — Generate proposed tasks linked to the key dates in the checklist.
- Import Tasks from CSV — Bulk-import tasks from a spreadsheet.
- CSV export — Download the checklist structure for review or offline editing.
- Suggested tasks — Add common tasks for known key date types.
Generated and CSV-imported key dates and tasks are a starting point, not a finished checklist — review them before relying on the checklist with clients.
Testing a checklist
Use Test template to preview the checklist against a sample effective date. The preview shows key dates, linked tasks, computed sample dates when available, and tasks not linked to any key date.
The preview is for template review. It is computed client-side and does not include configured holidays. Real transactions also use the transaction's actual contract dates, holidays, and any dates already extracted or entered.
Applying a checklist to a transaction
From the transaction Overview's closing timeline, click Generate Timeline and pick a checklist.
DocJacket can:
- Scope available checklists by the transaction's state, side, and type
- Show existing applied checklists so users do not accidentally stack duplicates
- Preview how many key dates and tasks will be created
- Show anchor dates used for calculation
- Assign tasks by owner or label
- Apply only selected phases
- Replace previously-applied template items when needed
- Preserve manually added items and contract-extracted dates when replacing template-generated items
After applying, the transaction has real key dates and real tasks. Moving key dates can update linked task due dates according to their rules.
Saving a transaction as a checklist
If you customize a transaction's key dates, tasks, and automations, you can save that work as a new checklist template. This is useful when a live deal becomes the model for a better workflow.
After saving, open the new checklist in the builder to clean up names, sections, assignments, and automations.
Checklists vs. key date rules
The Key Date Library stores individual reusable date rules. A checklist bundles those rules with tasks and automations.
Example:
- Key Date rule: Final Walkthrough = Closing Date - 1 business day
- Checklist task: Schedule walkthrough = Final Walkthrough - 3 days
- Automation: Prepare walkthrough reminder email when the task is due
Tips
- Start with the built-in templates and customize them for your specific workflow
- Create state-specific variations — a Texas residential close has different deadlines than a Florida one
- Include the most common tasks in your template so they are created when the checklist is applied
- Keep date calculation logic in the Key Date Library when the same rule will be reused
- Use task phases so users can apply only the work they need
- Test the checklist before applying it to a live transaction
- Review and update templates periodically as regulations or your workflow change